EdgeBuilder SDK
Getting Started
03 August 2006
EdgeBuilder SDK
03 August 2006 |
|
After you install the EdgeBuilder SDK, use this document to setup your system for EdgeClick application development, and deploy the sample EdgeClick applications included with the SDK.
It is assumed that the reader has at least a basic knowledge of Java development, and the components used in mobile services. For a reference of links to Java Programming topics, including Java SE and Java ME programming, see the Learning Java Resources web page. A functional overview of the components of EdgeClick is contained in the Development Overview.
Before you can begin service and mobile client development, you'll need to download and install additional software development tools not included in the EdgeBuilder SDK (due to licensing restrictions or size considerations):
The popular Eclipse Integrated Development Environment (IDE) is used for EdgeClick service development and deployment. For a tutorial on installing and using it, see Appendix A.
The Sun NetBeans 5.0 Integrated Development Environment (IDE) plus the NetBeans 5.0 Mobility Pack is the basic environment for developing Java ME programs. NetBeans provides a Java SE implementation, a Java source editor, a build environment, a packaging environment, a phone simulator, and a network monitor. The mobility pack adds the Java ME implementation. See the section Build the Java ME Hello Client, below, for a tutorial on using the NetBeans IDE to build a sample client.
Microsoft Visual Studio (Standard Edition or higher) and the Windows Mobile 5.0 Pocket PC SDK are required to develop applications for Windows Mobile phones. See the section Building and Testing the .NET Hello Client, below, for a tutorial on installing and using Visual Studio to build and test a sample client.
The Cygwin environment is useful for those who are used to a UNIX bash shell environment, with familiar UNIX utilities. It's available from http://www.cygwin.com.
The EdgeClick Processor (ECP) is what runs the services that will be requested from EdgeClick Mobile clients. The ECP must be running in order to deploy and test the sample EdgeClick Processor Services and Clients included with the SDK.
After installing the SDK, you can start the ECP using the Windows Start menu at Start-»All Programs-»EdgeBuilder. To start the ECP, select:
Start-»All Programs-»EdgeBuilder-»EdgeClick Processor Start
This starts the EdgeBuilder Apache, MySQL and JBoss services in the proper order. A Command Window entitled EdgeClick Processor Start displays the server log messages. A successful startup is indicated by a line like the following:
13:15:24,390 INFO  [Server] JBoss (MX MicroKernel) [4.0.4.GA (build:
 CVSTag=JBoss_4_0_4_GA date=200603311500)] Started in 32s:78ms
The EdgeClick window is designed to remain open while the ECP is running and displays the server log messages. Do not close this window or the ECP will stop. Once the ECP is up, services can be managed (deployed, redeployed, removed) without restarting the ECP. You can now, for example, use the HelloService to test it, as shown in the section Sample Services - HelloService, below.
Once you are finished with EdgeClick development, stop the ECP by selecting:
Start-»All Programs-»EdgeBuilder-»EdgeClick Processor Stop
An EdgeClick Processor Stop window opens to display shutdown messages as each compoent of EdgeClick is stopped. The EdgeClick Processor Start window also displays log messages as the ECP is shutdown. Once shutdown is complete, both windows display the prompt: Press any key to continue...; the windows close when you press a key.
The following sample services and clients are provided with the EdgeBuilder SDK:
| Service | Description | Java ME Client | .NET 2.0 Client |
|---|---|---|---|
| HelloService | Send email/SMS to subscriber's client | Yes | Yes |
| MIGs | Define and report progress on goals | No | Yes |
| Meter | Remote meter reading data collection | Yes | No |
Note that the HelloService and MIGs solutions are buildable and deployable on the development EdgeClick Processor provided with the EdgeBuilder SDK. The Meter solution is an example of a solution that uses an agent, and so cannot be deployed entirely on the development machine. See the subsections that follow for these services.
The HelloService is a simple sample service with two purposes: it lets you confirm that installation of EdgeBuilder and its enclosed EdgeClick Processor has been successful, and it serves as a basic example of how to code EdgeClick mobile clients and services.
In the instructions below, %EC_HOME% refers to the
directory under which you installed EdgeBuilder (by default,
C:\EdgeBuilder); the %EC_HOME% environment variable
was set during installation.
The ECP must be running in order to deploy the HelloService on it. See the section Starting and Stopping the EdgeClick Processor.
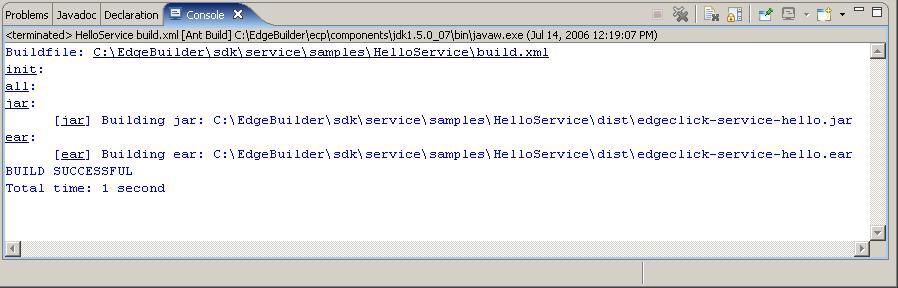
The HelloService source code is installed under %EC_HOME%\sdk\service\samples\HelloService. The quickest way to build and deploy the sample HelloService is to use Ant from the command line:
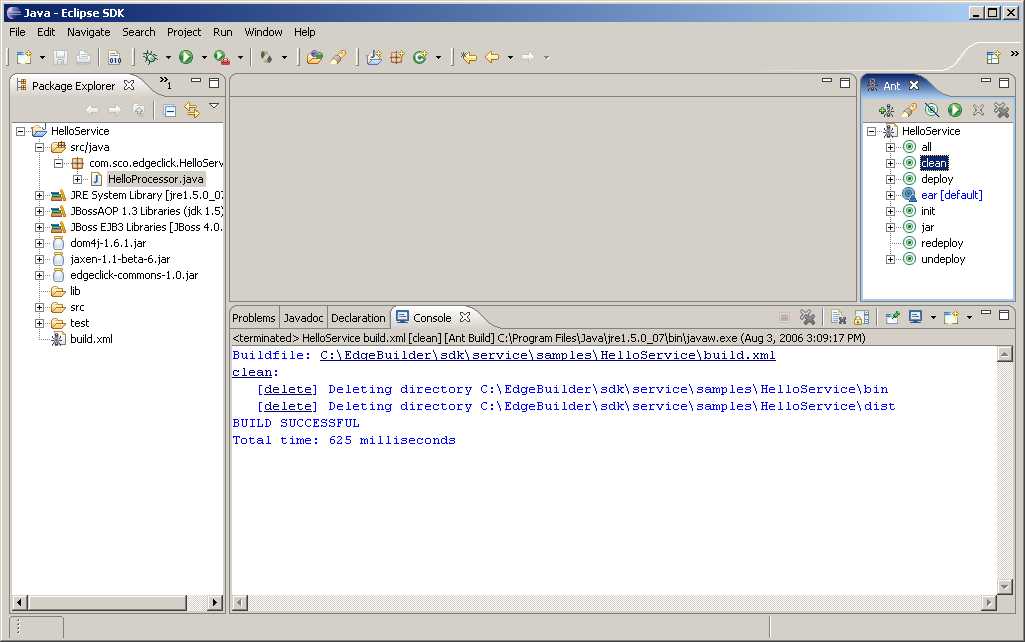
Buildfile: build.xml

clean:

BUILD SUCCESSFUL
Total time: 1 second
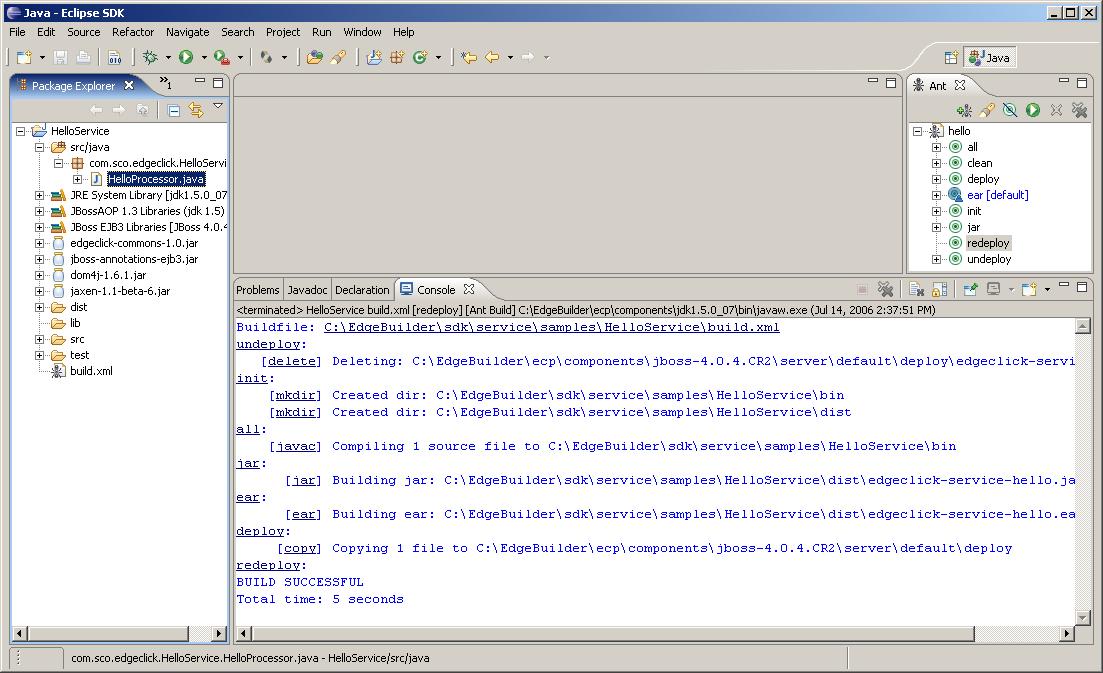
Buildfile: build.xml
init:
[mkdir] Created dir: C:\Edgebuilder\sdk\service\samples\HelloService\bin
[mkdir] Created dir: C:\Edgebuilder\sdk\service\samples\HelloService\dist
all:
[javac] Compiling 1 source file to C:\Edgebuilder\sdk\service\samples\HelloS
ervice\bin
jar:
[jar] Building jar: C:\Edgebuilder\sdk\service\samples\HelloService\dist\e
dgeclick-service-hello.jar
ear:
[ear] Building ear: C:\Edgebuilder\sdk\service\samples\HelloService\dist\e
dgeclick-service-hello.ear
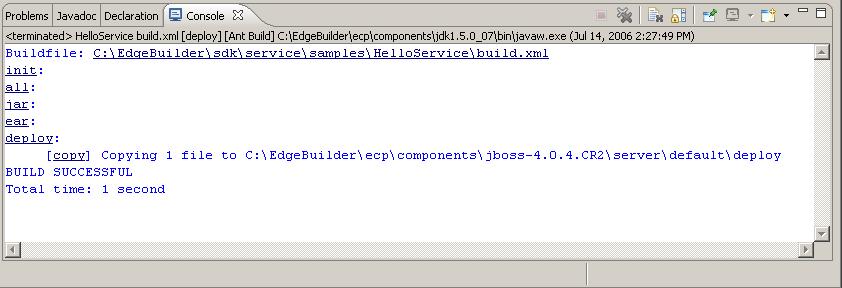
deploy:
[copy] Copying 1 file to C:\EdgeBuilder\ecp\components\jboss-4.0.4.GA\serv
er\default\deploy
BUILD SUCCESSFUL
Total time: 6 seconds
The Ant binary should be in your PATH after EdgeBuilder installation. If not, you can type %EC_HOME%\sdk\devtools\apache-ant-1.6.5\bin\ant. The deploy task will copy over the built EAR file into the JBoss deploy directory to register it with the EdgeClick Processor. You can verify the HelloService is deployed by watching the EdgeClick Processor Start command console window that was created when you started the ECP.
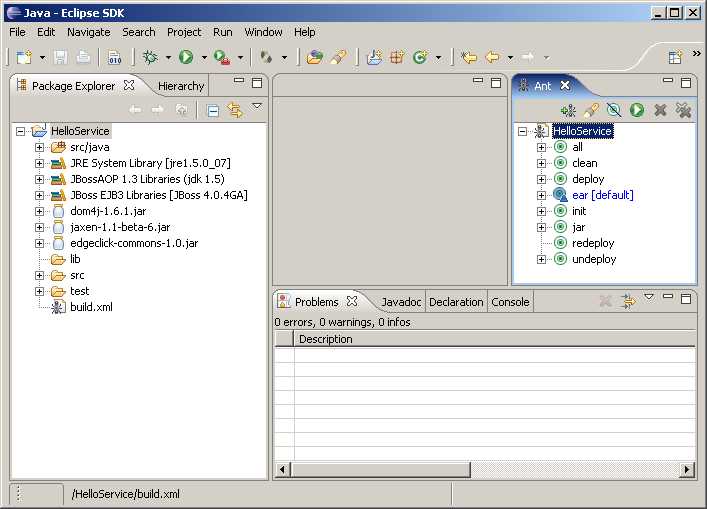
During development of a service, building and deploying a service is usually done from within Eclipse. For a tutorial that shows you how to build, deploy, edit, and redeploy a service using Eclipse, see Appendix A.
EdgeClick .NET 2.0 client applications are developed using Microsoft Visual Studio 2005, and are supported on phones that run either Windows Mobile 5.0 for Pocket PC, or Windows Mobile for Pocket PC 2003. Phones running two other Windows Mobile variants, Windows Mobile 5.0 Smartphone and Windows CE 5.0, do not support EdgeClick client applications.
Use the Start-»Control Panel-»Add or Remove Programs command to see if any of the components below are already installed.
Install ActiveSync 4.2 from http://www.microsoft.com/windowsmobile/downloads/activesync42.mspx
Install the Windows Mobile 5.0 Pocket PC SDK from http://www.microsoft.com/downloads/details.aspx?familyid=83A52AF2-F524-4EC5-9155-717CBE5D25ED.
Install the Virtual Machine Network Driver from http://www.microsoft.com/downloads/details.aspx?FamilyID=dc8332d6-565f-4a57-be8c-1d4718d3af65. (Note: this driver is required to test .NET clients using a mobile client emulator over a network connection. If you are testing on emulators using only ActiveSync connections over DMA, as described below in the client tutorials, then you do not need this driver.)
Install the .NET Compact Framework 2.0 Redistributable from http://www.microsoft.com/downloads/details.aspx?FamilyID=9655156b-356b-4a2c-857c-e62f50ae9a55.
For additional information on Windows Mobile development, see Microsoft's Mobile Developer Center.
Copy the folder named HelloServiceClient located in %EC_HOME%\sdk\client\DotNetCF2\Samples folder into a work folder, for example, into My Documents\Visual Studio 2005\Projects.
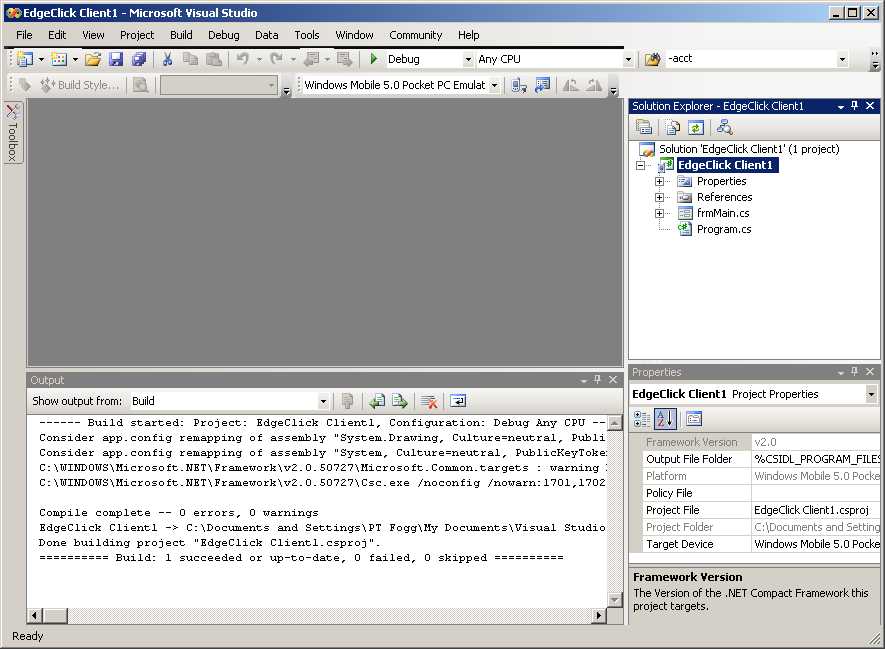
Run Visual Studio and build the application as follows:

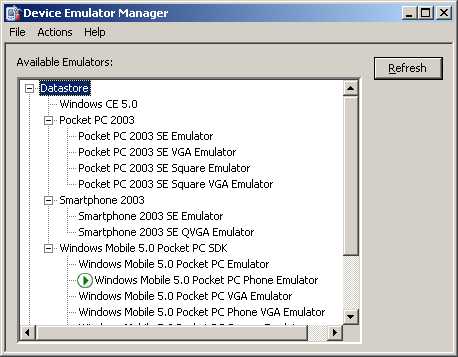
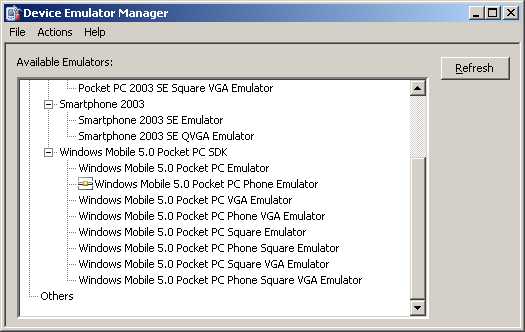
Now you can test the built client using the emulators available in Visual Studio. The emulator state and the account information you enter below are saved by default so that successive test runs do not require you to reconfigure the emulator or enter the account information again.
Choose an emulator:
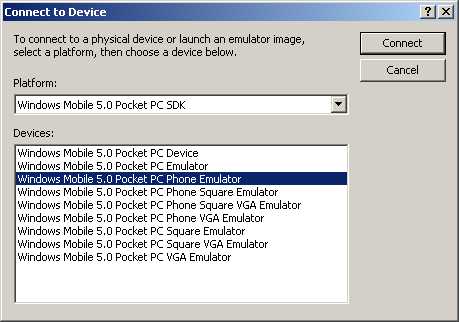
Configure the emulator.
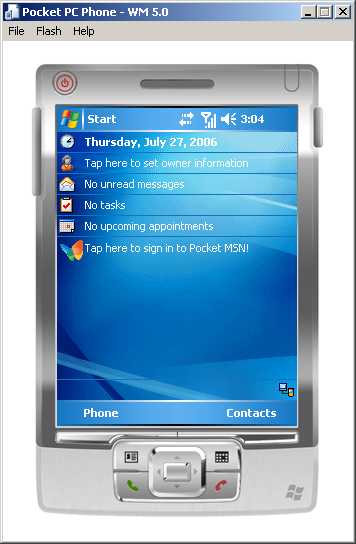
Note:If you previously entered this information and saved the emulator state when exiting the emulator (File-»Save State and Exit), then you do not need to perform this step again. The following instructions assume you are beginning with the default settings of the emulator. If you are not sure, you can reset the emulator by selecting File-»Reset-»Hard from the emulator window's main menu.
On the emulator screen within the emulator window:
Establish the emulator's ActiveSync connection with Visual Studio. This step must be done each time the emulator is opened to test a client via a network connection.
To test the emulator's network connectivity:
http://www.google.com.
The emulator should display the page.
(If your network or system has a firewall, make sure that the
firewall is configured to let the emulator access the network.)To test that the connection to the ECP is working:
http://light.http://light:8080.To run and test the Hello client on the emulator:
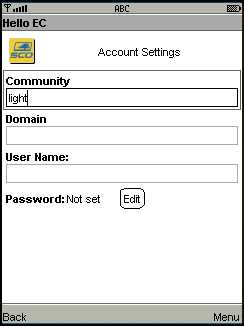
light.:8080 EdgeClickAdmin for the User Name.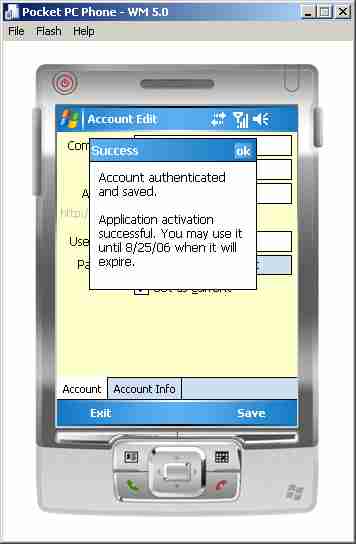
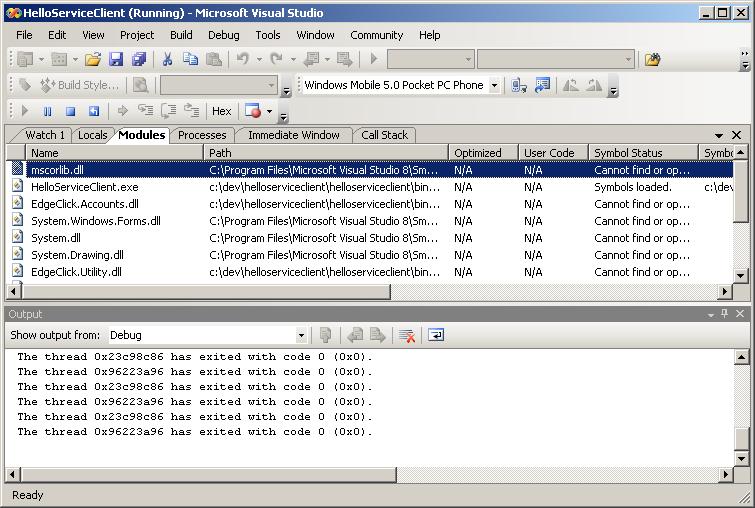
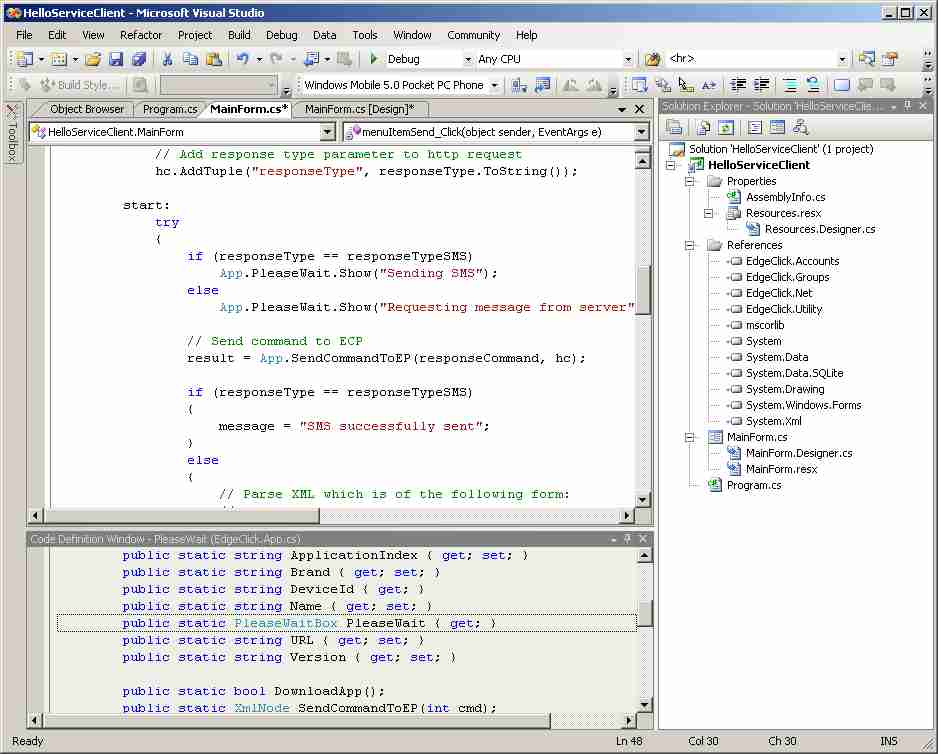
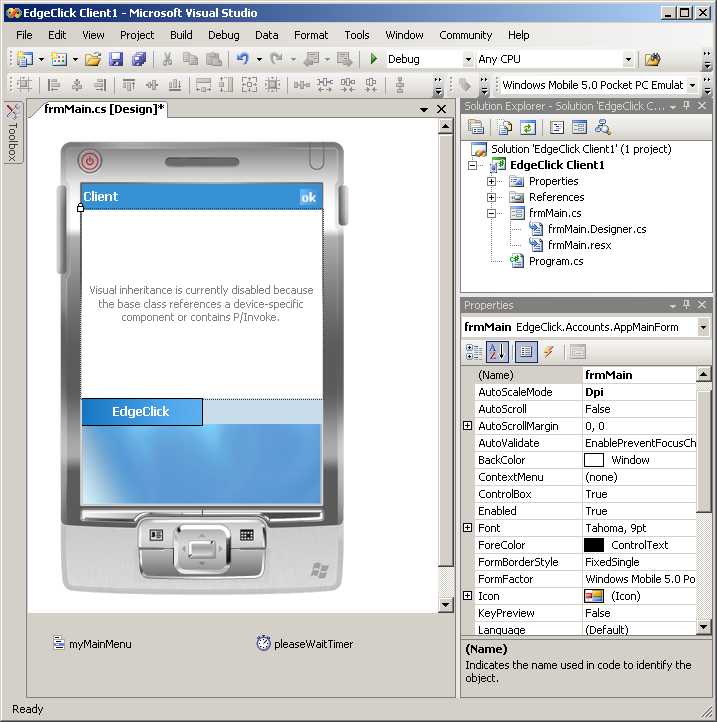
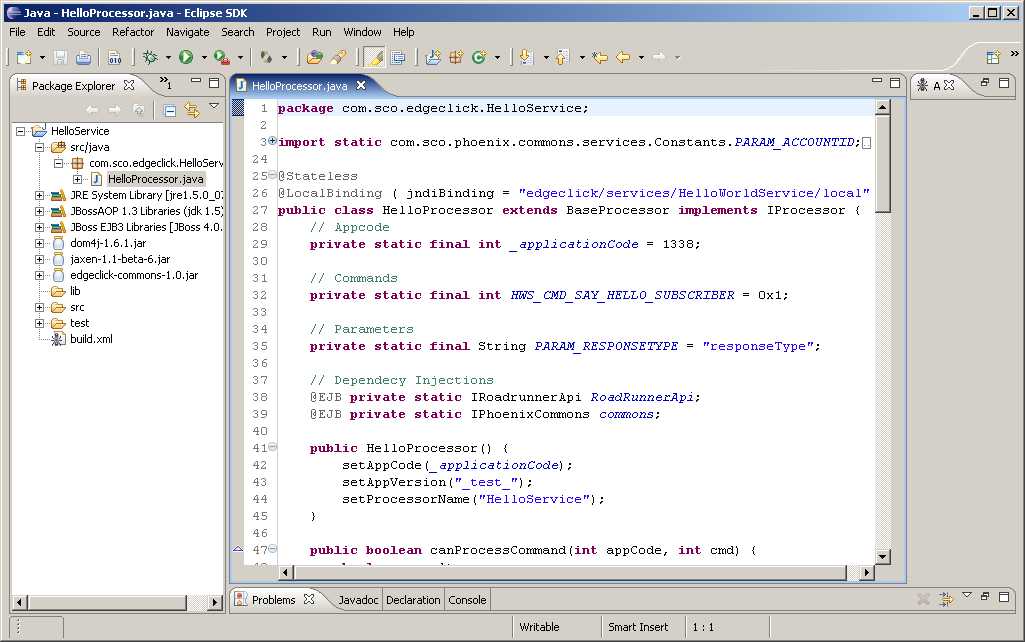
As you examine the source code, note that the main purpose of the client code is to display a form on the mobile client and exchange messages with the ECP. All other processing is performed on the ECP, including: accessing the Accounts database, authorizing access, constructing and sending the SMS or email.
126,71 (as shown in the Properties window).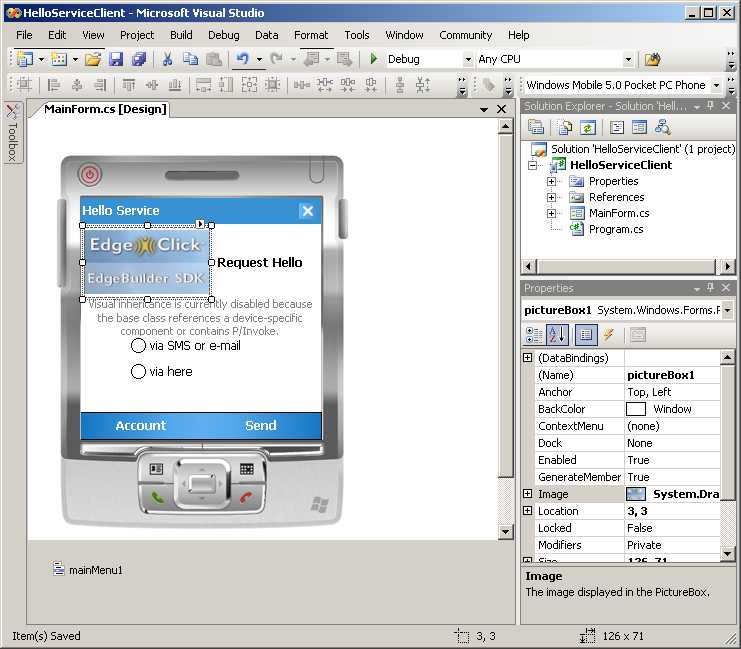
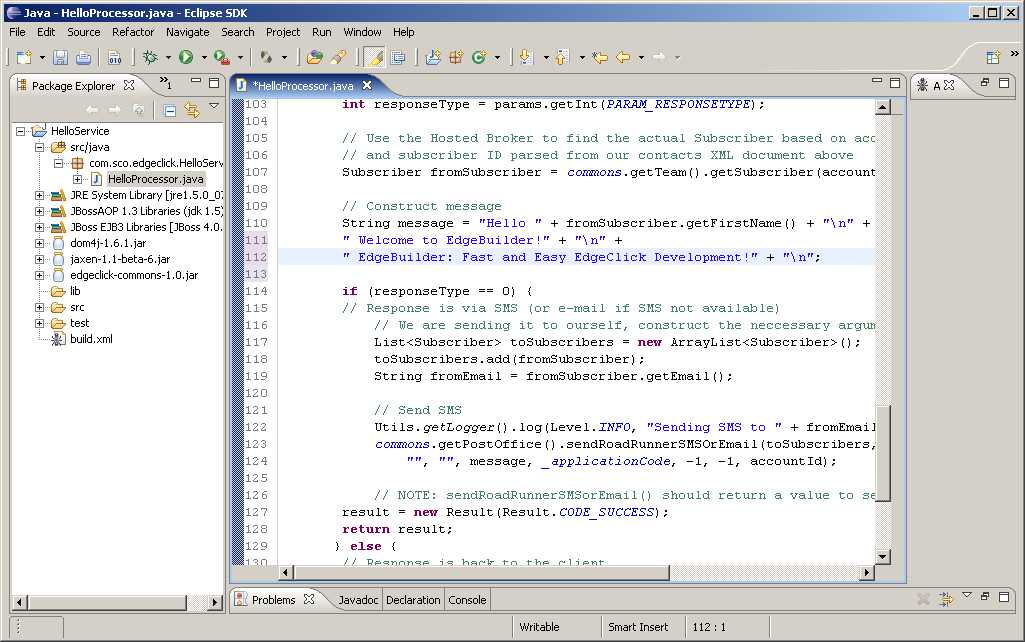
For a look at the HelloService code that runs on the ECP, see Appendix A.
See the Visual Studio Help menu for more information on using Visual Studio.
For a tutorial on using Visual Studio to package the client and deploy it on a smart phone, see Deploying an EdgeClick .NET Client Application.
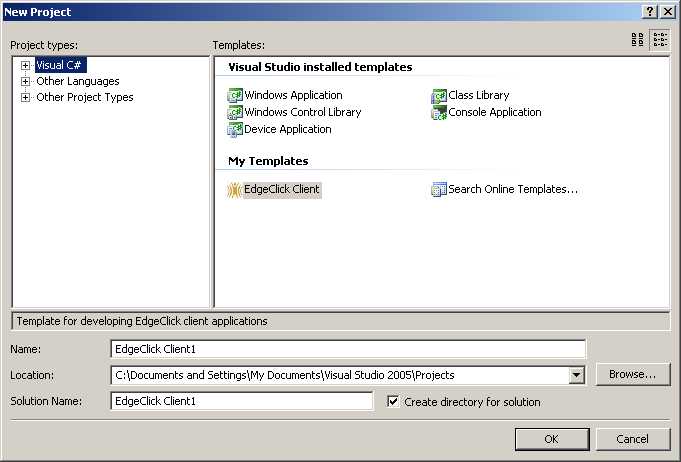
EdgeBuilder provides a Visual Studio C# template in the file %EC_HOME%\sdk\client\DotNetCF2\EdgeClickClient.zip. This template automates preparation of a new project, including adding references to the proper assemblies and defining a basic user interface form for the client.
To use the template:
To build the Java ME HelloService client requires the following software:
Note: The EdgeBuilder distribution includes NetBeans Version 5.5 Beta 2, which can be installed instead of the NetBeans Version 5.0 listed here.
An installer containing the JDK and NetBeans 5.0 is available on the Java SE Downloads website:
http://java.sun.com/javase/downloads/index.jsp
or they can be installed separately; see links on the above website.
The NetBeans Mobility Pack 5.0 is available from:
http://developers.sun.com/prodtech/javatools/mobility/downloads/index.jsp
If you install NetBeans 5.5 Beta 2, then you'll need to install the 5.5 version of the Mobility Pack instead of the 5.0 version. The 5.5 version is available from
http://www.netbeans.info/downloads/download.php?type=5.5b2:
You only need to download the NetBeans Mobility Pack from the above URL. Be sure to read the installation and release notes available from both of the download websites.
Note that while the Netbeans examples in this section use NetBeans 5.0, the same examples work on NetBeans 5.5 as well.
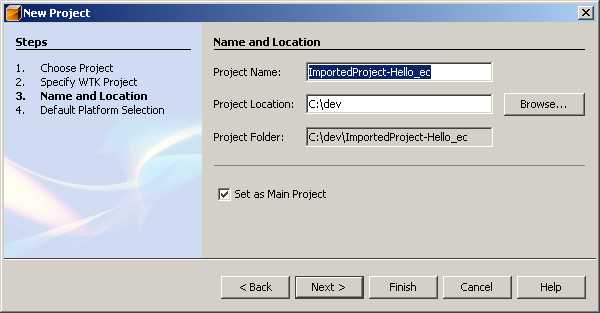
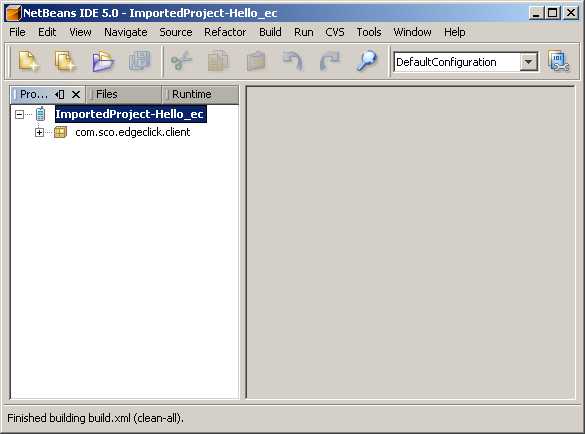
To build the Java ME HelloService client:
Start-»All Programs-»NetBeans 5.0-»NetBeans IDE
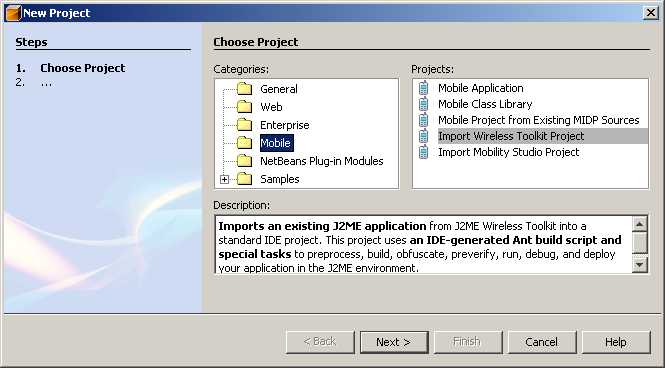
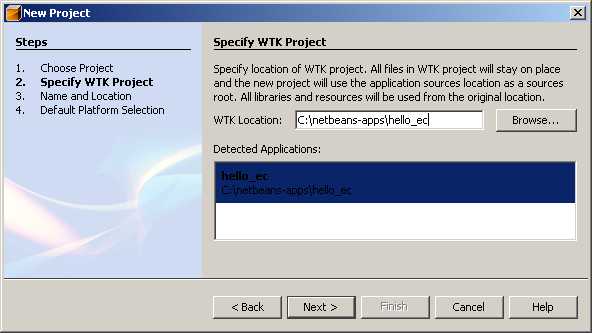
Specify C:\dev as the Project Location and accept the defaults for the other fields. Make sure the Set as Main Project check box is enabled.
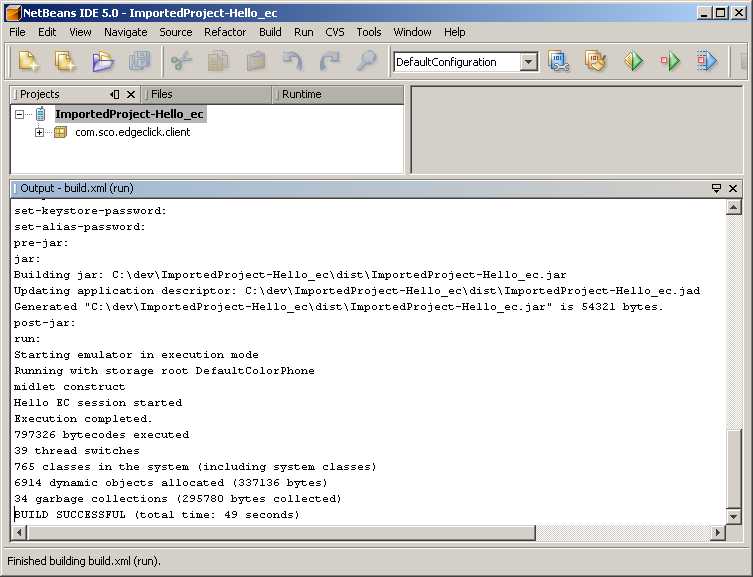
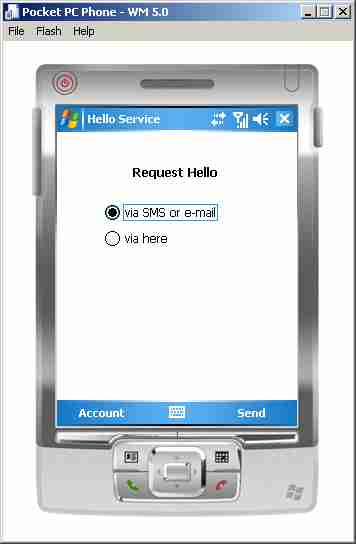
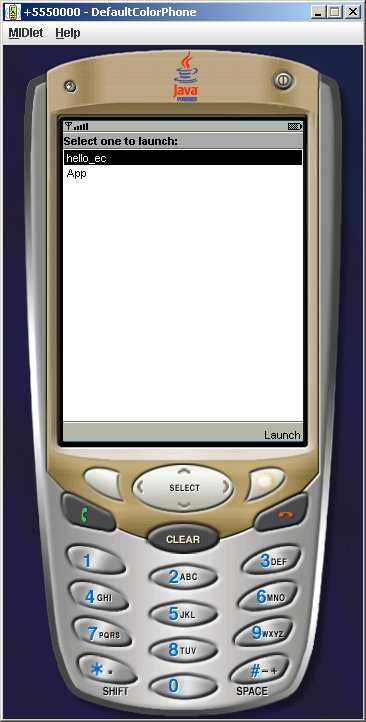
After completing the previous two sections successfully, do the following to run the Java ME Hello client:
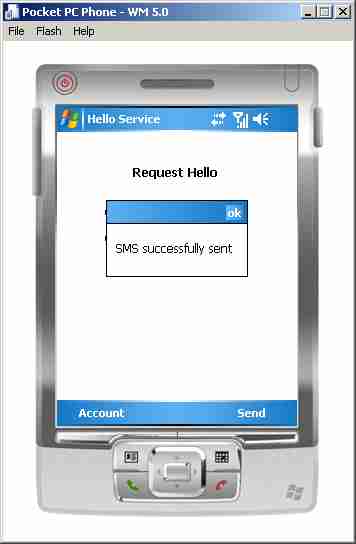
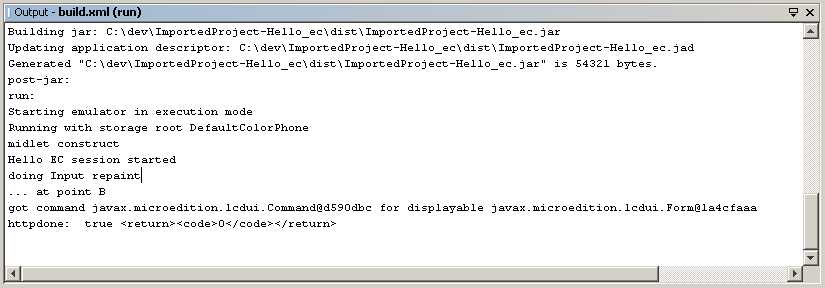
Messages like the following should be displayed in the NetBeans Output
window when the message is successfully sent:
Select the button under Back on the bottom left of the screen
to return to the Main client screen.
On subsequent runnings of the client, the Accounts manager will remember your settings and take you directly to the application, and you will have fewer steps than shown here.
Like the HelloService, and unlike the Meter service, the MIGs sample service uses a Windows Mobile .NET C# client. MIGs (Most Important Goals) represents a sample .NET client application that uses the EdgeClick .NET assemblies and EdgeClick MIGs server running on the ECP to create, review, update, and view the goals established for and by a user.
Initializing MIGs database.

c:\EdgeBuilder\sdk\service\samples\migs-service>C:\EdgeBuilder\ecp\components\mysql-5.0.22-win32\bin\mysql -u root  0<src\conf\db\mig_ddl.sql
Deploy the MIGs service on the ECP by entering the following commands:
Buildfile: build.xml

migs.init:
    [mkdir] Created dir: C:\EdgeBuilder\sdk\service\samples\migs-service\bin
    [mkdir] Created dir: C:\EdgeBuilder\sdk\service\samples\migs-service\dist

migs.compile:
    [javac] Compiling 3 source files to C:\EdgeBuilder\sdk\service\samples\migs-service\bin
    [javac] Note: C:\EdgeBuilder\sdk\service\samples\migs-service\src\java\com\sco\phoenix\services\migs\MigProcessor.java uses or overrides a deprecated API.
    [javac] Note: Recompile with -Xlint:deprecation for details.

migs.jar:
     [copy] Copying 1 file to C:\EdgeBuilder\sdk\service\samples\migs-service\bin\META-INF
     [copy] Copying 1 file to C:\EdgeBuilder\sdk\service\samples\migs-service\bin
      [jar] Building jar: C:\EdgeBuilder\sdk\service\samples\migs-service\dist\edgeclick-migs.jar

migs.ear:
      [ear] Building ear: C:\EdgeBuilder\sdk\service\samples\migs-service\dist\edgeclick-migs.ear

migs.deploy:
     [copy] Copying 1 file to C:\EdgeBuilder\ecp\components\jboss-4.0.4.GA\server\default\deploy

deploy:

BUILD SUCCESSFUL
Total time: 10 seconds
Buildfile: build.xml

MIGs.deploy:
     [copy] Copying 14 files to C:\EdgeBuilder\www\migs

deploy:

BUILD SUCCESSFUL
Total time: 2 seconds
You should now see the MIGs web interface (in any browser) at http://hostname/migs. This confirms that the service is working.
The .NET MIGs 1.0 is a sample EdgeClick client application. It demonstrates the classes and methods that allow a Windows Mobile application to authenticate and communicate with the EdgeClick processor, accessing the EdgeClick services. It utilizes a set of Microsoft .NET Compact Framework 2.0 assemblies that are deployed on Windows Mobile phones.
It consists of four Visual Studio projects:
See the section .NET 2.0 Client Development Requirements, above, for the software you need to install to build and deploy the MIGs client.
Copy the folder named MIGs located in %EC_HOME%\sdk\client\DotNetCF2\Samples into a work folder, for example, into C:\Visual Studio 2005\Projects. Open Visual Studio, and build the MIGs application as follows:
After the MIGs solution is open, in Solution Explorer:
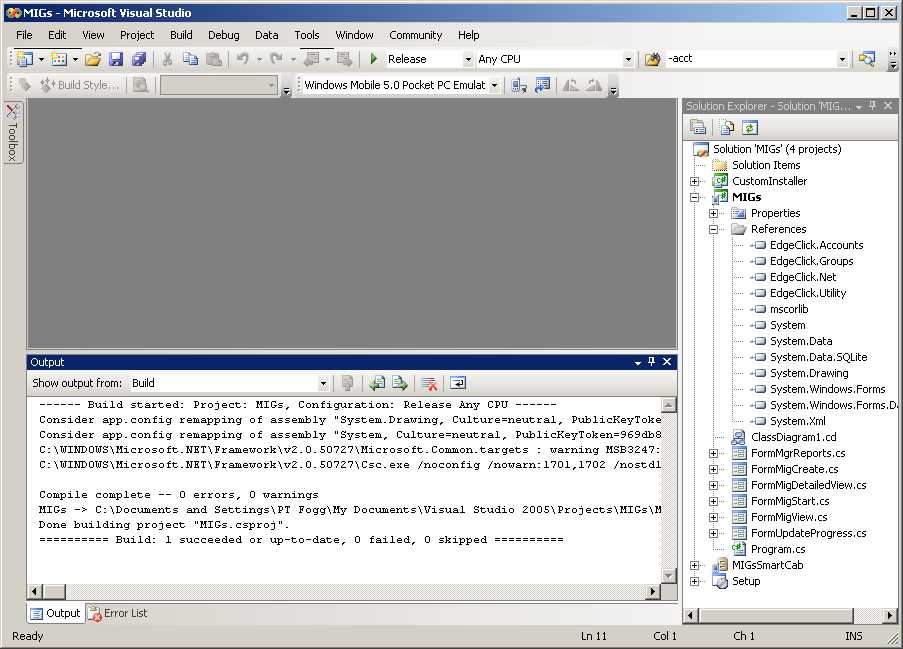
The .NET assemblies will be deployed on the emulator. A "wait wheel" appears on the emulator screen while the deployment progresses. Note that the process is a bit slow, depending upon the memory available.
On first running the application, an authentication form will be presented. (On subsequent runs, the form is not displayed, since the user is already authenticated.) Fill the form as follows:
Upon successful authentication, the following screen
is displayed:
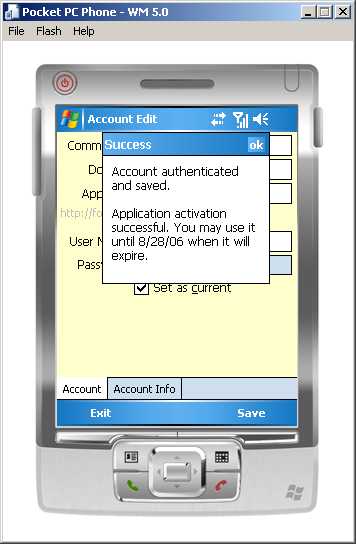 select OK and the MIGs Main form will
be launched.
select OK and the MIGs Main form will
be launched.
There are several good pages describing the Visual Studio 2005 application deployment procedure. For example: Create Setup Files for your Windows Mobile Applications Using Visual Studio 2005
To deploy MIGs to a device, a Cabinet (CAB) file needs to be created. The CAB file is expanded and installed on the device. The CAB file contains the application and all its dependencies and other files that need to be deployed with an application.
A successful build of MIGsSmartCAB project creates the .CAB file in MIGsSmartCAB\Release.
A successful build of CustomInstaller project creates a CustomIntaller.dll file in CustomInstaller\bin\Release.
A successful build of Setup project creates a Setup.msi file in Setup\Release.
A Windows setup program will be initiated that will:
To remove the MIGs application from your development machine, use the Windows Add/Remove Programs Manager from the Control Panel.
To remove the MIGs application from the mobile phone:
The Meter demo application is also included as a sample, including client, service, and agent components. A web admin component does not yet exist.
The Meter sample application is different from the other samples in the EdgeBuilder SDK because it contains an agent. The agent is NOT set up to run under EdgeBuilder. Thus, unlike the HelloService, this entire sample cannot be used for installation verification or for quick execution. Instead, this example is meant as an example for study, for developers writing their own EdgeClick applications that need agents. When you do start the process of building Meter, or an application like it, it should be built in "backwards" order: agent, then service, then client. The following sections describe this.
The directory %EC_HOME%/sdk/agent/samples/MeterAgent/ contains an example agent for the Meter application. By their nature, agents are all different, as they integrate existing applications with the EdgeClick architecture. An agent may be written in any language to run on any operating system; the only requirement is that it use SOAP/XML-based web services to communicate with the EdgeClick Processor.
This sample MeterAgent is a very simple agent, that just takes incoming meter reading records from the Meter service and writes them out to a flat file on the agent's host system filesystem. Presumably an existing application would periodically read this flat file and process the records. The purpose of including this agent in the samples is to give a concrete example of what an agent might look like.
The MeterAgent is written in Java, to run under the Apache Tomcat application server and Apache Axis web services implementation. The agent's Java code is written to run under a UNIX operating system, and the make-agent build script is written to install the agent on a SCO UnixWare 7 or OpenServer 6 system. Both aspects can be adapted to other environments.
The directory %EC_HOME%/sdk/service/samples/MeterService/ contains the service implementation for the Meter sample application.
Before the service can be built, some source code stub routines to handle the agent's web services must be generated. This is done by going to the src/java directory and editing the do-wsdl2java.bat script. Change the URL on the final command to wherever you deployed the agent. Then run the script by executing do-wsdl2java in a Windows command window. This will populate some source code in src/java/com/sco/agent.
Next, MeterService should be built and deployed in the EdgeClick Processor. Go back up to the MeterService directory, and execute "ant deploy" (or "ant redeploy" for iterative development) to build and deploy the service. Do not do "ant clean" first, as that will remove the stubs generated in the previous step.
Another difference between MeterService and HelloService, is that MeterService makes use of a local database on the EdgeClick Processor, whereas HelloService did not. This database needs to be created and initialized, which is done by going to the src/conf/db directory and running the load_meter.bat script.
MeterService is now fully deployed on the ECP.
Note that currently no web administration pages exist for maintaining the MeterService's two database tables. Thus, to add Billing Centers or Meter Readers, you must do manual database changes, by adding or modifying data in the Metertestdata.sql file in the above directory, and then rerunning the load_meter.bat script. As a consequence of this, you need to know the account number and subscriber number of the subscribers you are adding as Meter Readers. These can be determined by using the MySQL Query Browser and inspecting the tables meinc_hosted.account and meinc_hosted.subscriber.
The directory %EC_HOME%/sdk/client/JavaME/samples/meter/ contains the Java ME client for the Meter sample application.
To use it, follow the same directions as for the hello_ec client for the sample HelloService, only in a meter project rather than the hello_ec project. See Build the Hello client.
Final testing of a fully built Meter sample, or applications like it, would be done from the WTK phone simulator. However, before getting to that point, it is useful to have some vehicles to do intermediate testing of internal interfaces. These are ONLY for the use of actual developers doing development work, not for regular users. Accordingly, in the MeterService/test directory, there are two such additional test vehicles.
The first, make-demo.bat with MeterAgentDemo.java, provides a standalone test of the Meter Agent from the EdgeBuilder system, without the complexities of running inside the EdgeClick Processor environment. All Agents should be tested in this manner, before attempting to contact them from the actual service.
The second, test_meter.html, is a so-called HTML Test Client. This is not a web browser-based UI for the Meter service (such a client would be constructed with AJAX technology), but rather a unit test vehicle for MeterService's functionality. Using this, you can simulate input to each different "command" in the service, and check the XML that is returned. It is often productive to test services in this manner, before attempting to contact them from the actual client, whether running on a phone simulator or an actual phone.
After the ECP has fully started, the EdgeClick/MeInc web administration site can be opened by selecting:
Start-»All Programs-»EdgeBuilder-»EdgeClick Admin Site
This will bring up the admin site and allow you to login as the administrator and add subscribers and do other functions.
The EdgeClick Administration Web Pages allow you to maintain the valid list of subscribers for your development ECP. The development ECP included with EdgeBuilder is limited to one account and 10 subscribers. (Note that while account creation in the web admin pages does work, attempts to log in to a newly created account via the web admin page or clients will always fail.)
At least one subscriber, the administrator, is defined at installation time. The installer prompts for an administrator login and password; if not provided, the defaults of EdgeClickAdmin and scoTest are used.
From the EdgeClick Admin Pages you can update the Administrator's profile, and define other subscribers and groups as test data for your application and service development.
To update the subscriber information for the ECP Adminstrator:
Start-»All Programs-»EdgeBuilder-»EdgeClick Admin SiteThe EdgeClick Administration site opens in your default browser.
Eclipse is the Integrated Development Environment (IDE) that you use to create, edit, build, and deploy EdgeClick Services. When performing the tasks in this section, the EdgeBuilder SDK should have already been installed.
You can either install Eclipse and the JBOSS plug-in separately, or install both at the same time.
To install both Eclipse and an already integrated JBOSS plug-in:
http://www.jboss.com/products/jbosside/downloads
To install only Eclipse on your development system:
Eclipse can be installed from the EdgeBuilder installer, or following the instructions below.
To install the JBOSS plug-in into an already installed Eclipse:
Regardless of how you obtain Eclipse, make sure that the compiler compliance level is set properly and Ant is configured, as follows:
In this tutorial, you'll learn how to import one of the sample EdgeClick services included with the EdgeBuilder SDK, make a trivial change to the source code, build it, and deploy it within the running EdgeClick Processor on your development system.
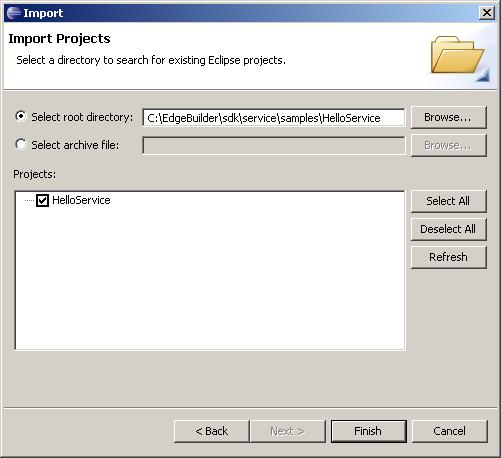
Select Finish to load the project.
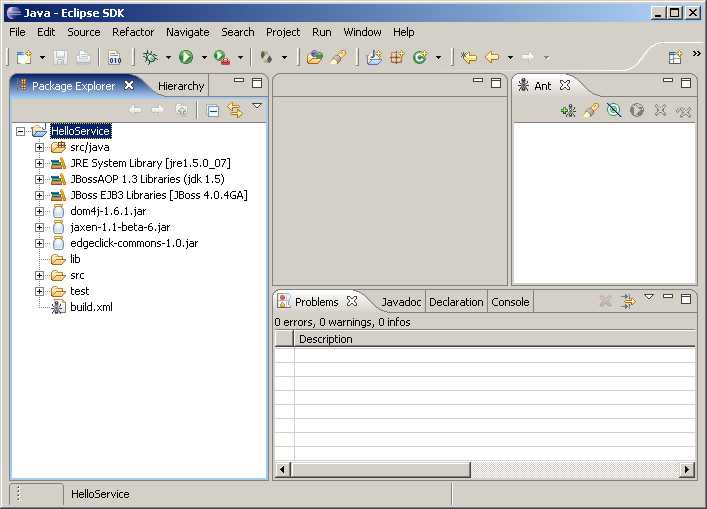
The Problems window at the bottom of Eclipse should show no errors. (If there are errors complaining about a compiler level mismatch, make sure you followed the notes in the section Eclipse configuration.)
To deploy the service we just built, first make sure the EdgeClick processor is running. If it is, there will be an EdgeClick Processor Start window open on your desktop. If it is not running, select Start>>All Programs>>EdgeBuilder>>EdgeClick Processor Start.
In the EdgeClick Processor Start window on your Desktop, the following messages indicate a succesful deployment:
15:55:46,609 INFO  [EARDeployer] Init J2EE application:
file:/C:/EdgeBuilder/ecp/components/jboss-4.0.4.GA/server/default/deploy/edgeclick-service-hello.ear
15:55:46,640 INFO  [EARDeployer] Started J2EE application: file:/C:/EdgeBuilder/ecp/components/jboss-4.0.4.GA/server/default/deploy/edgeclick-service-hello.ear
The EdgeClick Processor Start window should display messages indicated that the service was successfully deployed.
For each EdgeClick service you create, you'll probably want to define a top-level project within Eclipse, as in the procedure above. You can copy one of the sample services and alter the contents of the directories for your application.
At the top level of your Eclipse project, you will have a
build.xml file that is in Ant format.
You can model yours after the build.xml file in the
sample
application and do a global replace of your project name for the sample
project name.
Then, import the edited service as shown in the procedure above.
New source files can be created from within Eclipse, or using any method, and then imported into the project.
See the Eclipse documentation under the Help menu for complete instructions on using Eclipse. Also see the Eclipse web site at http://www.eclipse.org.
The source code for the Java ME client can be built with either NetBeans or the Java Wireless Toolkit (upon which NetBeans is based). The WTK is available at http://java.sun.com/products/sjwtoolkit/. Download the latest stable version (Sun developer program registration may be required). These instructions assume it was installed into C:\WTK22.
To build the HelloService client:
Start-»All Programs-»J2ME Wireless Toolkit 2.2-»KToolbar
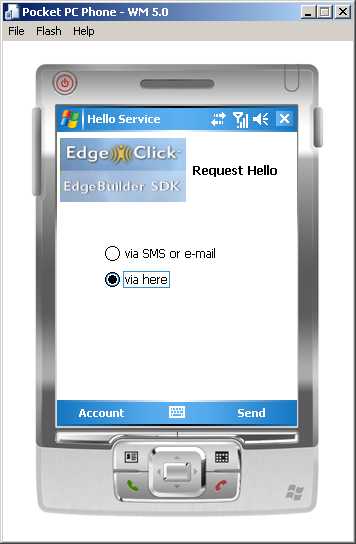
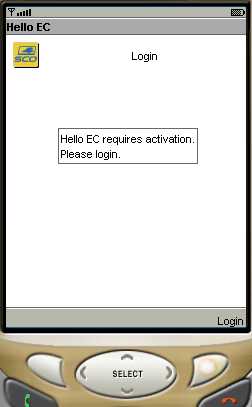
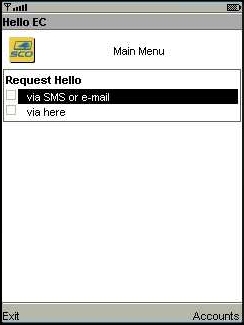
After completing the previous section successfully, do the following to run the HelloService:
If both of these choices work, EdgeBuilder is working properly.
On subsequent runs of the HelloService, the Accounts manager will
remember your settings and take you directly to the application,
and you will have fewer steps than shown here.
© Copyright 2006 The SCO Group, Inc. All Rights Reserved.